Investing in a new garage door not only improves the look and value of your house but also increases the safety and convenience of your family’s daily lives. As a handyman, you can install your new garage door in one day by having all garage door parts. Installation includes disassembly and disposal of the old door as well as installation of the new one.
Getting a Garage Door Installed
If you want to begin installing your new garage door safely and efficiently, make sure you have all the required equipment and follow the installation guidelines and instructions supplied by the manufacturer. Preparation is key to a successful garage door installation.You can quickly install a garage door by following these simple steps after you have the right tools. To install sectional garage doors, which are the most typical style of residential garage door with 3-8 panels that glide up and down a track, the sections are inserted one at a time, making their way from the bottom to the top.
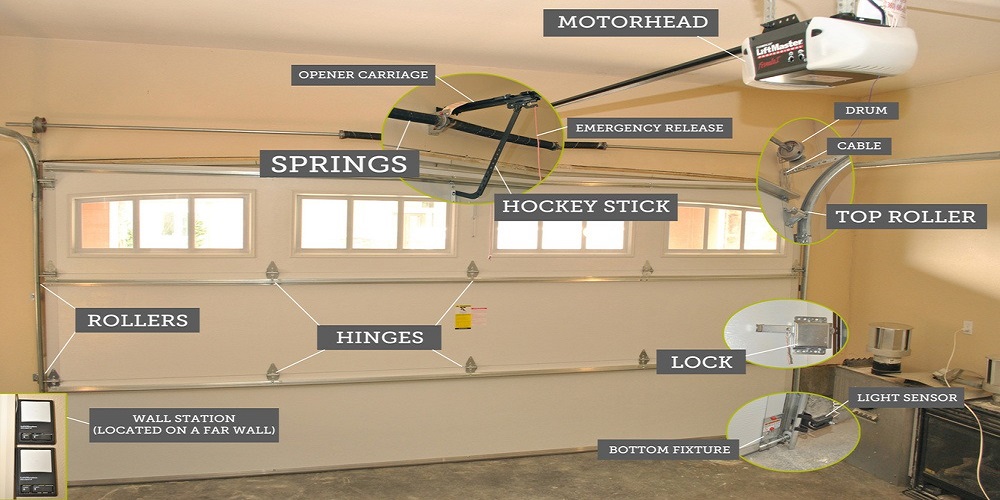
Garage Door Hardware
Due to the high weight and stress on garage door springs, special attention should be exercised during this initial stage of installation. They can be dangerous if handled incorrectly, resulting in human harm and property damage. Torsion spring tension must be released before working on the garage door. To disconnect your garage door opener, you must first release the door's tension. Pull the red emergency handle to safely detach the door. You may now manually lower the door by moving the trolley arm into a vertical position.Garage Door Panels Installation
The top panel of a car garage door should be reinforced with a reinforcing bar to prevent it from bending in the middle. Then, drill pilot holes and fasten the bar into the panel with screws, if the manufacturer hasn't already done so. Attaching the top and bottom panels of the axle supports. Checking to make sure the bottom panel is level before securing it in placeAssembling each new panel on top of the one before it, make sure that its groove and ridgeline are up perfectly. Continue this process until all of the panels are in their respective positions.
To assemble the tracks, first, attach the horizontal ones to the door and then the vertical ones together using bolts.